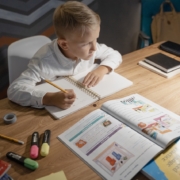
Lesson Title:Understanding Estimation and Rounding
Lesson Objective: Students will understand the concept of estimation and rounding and be able to use these techniques to solve problems in real-life situations.
Materials:
Chart paper and markers
Worksheets with estimation and rounding problems
Manipulatives (such as base ten blocks or unifix cubes)
Introduction (5 minutes):
Begin by asking the students if they know what estimation and rounding are. Allow them to share their ideas and write them on the board.
Next, explain that estimation is a way to find an approximate answer to a problem quickly, and rounding is a way to simplify a number by changing it to the nearest multiple of ten, hundred, etc. For example, if you want to estimate the number of apples in a bag, you might count them quickly and estimate that there are about 20 apples in the bag. If you want to round the number of apples to the nearest ten, you would say that there are about 20 apples in the bag.
Direct Instruction (15 minutes):
Using manipulatives (such as base ten blocks), demonstrate how to estimate and round numbers. For example, use 10 blocks and show how to estimate how many blocks there are by quickly counting them and then round the number to the nearest ten.
Next, have the students work in pairs to practice estimating and rounding with manipulatives.
As they work, walk around to check for understanding and provide assistance as needed.
Guided Practice (15 minutes):
Provide the students with worksheets containing estimation and rounding problems.
Have them work in pairs to complete the worksheets, with one student solving the problem and the other student checking the work.
Monitor the student progress and provide assistance as needed.
Independent Practice (10 minutes):
Give the students more worksheets with estimation and rounding problems and have them work independently.
Circulate around the room to check for understanding and provide assistance as needed.
Closure (5 minutes):
Have students share one real-life situation where they could use estimation or rounding.
Review the main concept of estimation and rounding and remind the students that estimation is a way to find an approximate answer to a problem quickly, and rounding is a way to simplify a number by changing it to the nearest multiple of ten, hundred, etc.
Assessment: Observe the students during independent practice and check their worksheets for accuracy.
Extension:
Have the students create their own estimation and rounding problems and have them share it with the class.
Allow them to play math games that involve estimation and rounding, such as “Estimation Race”
Note:
Remember to differentiate instruction to meet the needs of all the students in your class.
Encourage students to use estimation and rounding in real-life situations, such as measuring length, weight, or time.
Overall, the goal of this lesson is to introduce the concept of estimation and rounding and provide students with hands-on practice using these techniques. Through the use of manipulatives, worksheets, and interactive activities, students will develop a better understanding of estimation and rounding and be able to use them to solve problems in real-life situations.
https://www.fractions4kids.com/wp-content/uploads/2023/02/fractions-for-kids-75.jpg8531280fractions4kidshttps://www.fractions4kids.com/wp-content/uploads/2023/01/logo-2.pngfractions4kids2023-02-04 18:11:432023-02-05 05:20:52Printable Lesson Plan on Understanding Estimation and Rounding
Lesson Objective: Students will understand the concept of logical reasoning and be able to use it to solve problems and make logical conclusions.
Materials:
Chart paper and markers
Logic puzzles and riddles
Chart paper and markers
Introduction (5 minutes):
Begin by asking the students if they know what logical reasoning is. Allow them to share their ideas and write them on the board.
Next, explain that logical reasoning is the process of using clues, facts, and evidence to solve problems and make logical conclusions. It is like solving a mystery or a puzzle.
Direct Instruction (15 minutes):
Share a simple logic puzzle or riddle with the class and have them work together to solve it.
Next, have the students work in pairs to solve more logic puzzles and riddles.
As they work, walk around to check for understanding and provide assistance as needed.
Guided Practice (15 minutes):
Provide the students with a worksheet containing a logic puzzle or riddle.
Have them work in pairs to solve the problem, with one student solving the problem and the other student checking the work.
Monitor the student progress and provide assistance as needed.
Independent Practice (10 minutes):
Give the students more worksheets with logic puzzles and riddles and have them work independently.
Circulate around the room to check for understanding and provide assistance as needed.
Closure (5 minutes):
Have students share one thing they learned about logical reasoning today.
Review the main concept of logical reasoning and remind the students that logical reasoning is the process of using clues, facts, and evidence to solve problems and make logical conclusions.
Assessment: Observe the students during independent practice and check their worksheets for accuracy.
Extension:
Have the students create their own logic puzzles and riddles and have them share it with the class.
Allow them to play logic games and puzzles, such as Sudoku or Tangrams
Note:
Remember to differentiate instruction to meet the needs of all the students in your class.
Encourage students to use logical reasoning in other subjects, such as science and social studies.
Overall, the goal of this lesson is to introduce the concept of logical reasoning and provide students with hands-on practice using it to solve problems and make logical conclusions. Through the use of logic puzzles, riddles, and interactive activities, students will develop a better understanding of logical reasoning and be able to apply it in various situations.
https://www.fractions4kids.com/wp-content/uploads/2023/02/fractions-for-kids-76.jpg8531280fractions4kidshttps://www.fractions4kids.com/wp-content/uploads/2023/01/logo-2.pngfractions4kids2023-02-04 18:11:432023-02-05 05:20:31Understanding Logical Reasoning Printable Lesson Plan for Teachers
Lesson Objective: Students will understand the concept of patterns and be able to identify, create, and continue patterns using various mathematical operations.
Materials:
Chart paper and markers
Pattern blocks or manipulatives (such as unifix cubes or base ten blocks)
Worksheets with patterns
Introduction (5 minutes):
Begin by asking the students if they know what patterns are. Allow them to share their ideas and write them on the board.
Next, explain that patterns are a way of organizing and understanding information by noticing a repeating sequence of numbers, shapes, or colors. For example, a pattern of red, blue, red, blue is a repeating sequence of colors.
Direct Instruction (15 minutes):
Using manipulatives (such as pattern blocks), demonstrate how to identify and continue patterns. For example, use pattern blocks to create a pattern and then have the students identify the next block in the pattern.
Next, have the students work in pairs to practice identifying and continuing patterns with manipulatives.
As they work, walk around to check for understanding and provide assistance as needed.
Guided Practice (15 minutes):
Provide the students with worksheets containing patterns.
Have them work in pairs to complete the worksheets, with one student identifying the pattern and the other student continuing the pattern.
Monitor the student progress and provide assistance as needed.
Independent Practice (10 minutes):
Give the students more worksheets with patterns and have them work independently.
Circulate around the room to check for understanding and provide assistance as needed.
Closure (5 minutes):
Have students share one pattern they created today.
Review the main concept of patterns and remind the students that patterns are a way of organizing and understanding information by noticing a repeating sequence of numbers, shapes, or colors.
Assessment: Observe the students during independent practice and check their worksheets for accuracy.
Extension:
Have the students create their own patterns using manipulatives and have them share it with the class.
Allow them to play math games that involve patterns, such as “Pattern Memory”
Note:
Remember to differentiate instruction to meet the needs of all the students in your class.
Encourage students to use patterns in other subjects, such as art and music.
Overall, the goal of this lesson is to introduce the concept of patterns and provide students with hands-on practice identifying, creating, and continuing patterns. Through the use of manipulatives, worksheets, and interactive activities, students will develop a better understanding of patterns and be able to apply it in various situations.
https://www.fractions4kids.com/wp-content/uploads/2023/02/fractions-for-kids-77.jpg8531280fractions4kidshttps://www.fractions4kids.com/wp-content/uploads/2023/01/logo-2.pngfractions4kids2023-02-04 18:11:432023-02-05 05:20:11Lesson Plan for Teachers on Understanding Patterns
Lesson Objective: Students will understand the concept of money and be able to count, compare, and make change for different monetary values.
Materials:
Chart paper and markers
Play money (such as coins and bills)
Worksheets with money problems
Introduction (5 minutes):
Begin by asking the students if they know what money is and what it is used for. Allow them to share their ideas and write them on the board.
Next, explain that money is a medium of exchange used to purchase goods and services. It comes in many forms, such as coins and bills, and it is important to be able to count, compare, and make change with it.
Direct Instruction (15 minutes):
Using play money (such as coins and bills), demonstrate how to count and compare different monetary values. For example, use five $1 bills and three quarters and show how to count the total value of the money and compare it to other values.
Next, have the students work in pairs to practice counting and comparing money.
As they work, walk around to check for understanding and provide assistance as needed.
Guided Practice (15 minutes):
Provide the students with worksheets containing money problems.
Have them work in pairs to complete the worksheets, with one student solving the problem and the other student checking the work.
Monitor the student progress and provide assistance as needed.
Independent Practice (10 minutes):
Give the students more worksheets with money problems and have them work independently.
Circulate around the room to check for understanding and provide assistance as needed.
Closure (5 minutes):
Have students share one thing they learned about money today.
Review the main concept of money and remind the students that money is a medium of exchange used to purchase goods and services and it is important to be able to count, compare, and make change with it.
Assessment: Observe the students during independent practice and check their worksheets for accuracy.
Extension:
Have the students create their own money problems and have them share it with the class.
Allow them to play math games that involve money, such as “Money Match”
Note:
Remember to differentiate instruction to meet the needs of all the students in your class.
Encourage students to use money in real-life situations, such as going to the store or making a purchase.
Overall, the goal of this lesson is to introduce the concept of money and provide students with hands-on practice counting, comparing, and making change for different monetary values. Through the use of play money, worksheets, and interactive activities, students will develop a better understanding of money and be able to apply it in real-life situations.
https://www.fractions4kids.com/wp-content/uploads/2023/02/fractions-for-kids-78.jpg8531280fractions4kidshttps://www.fractions4kids.com/wp-content/uploads/2023/01/logo-2.pngfractions4kids2023-02-04 18:11:432023-02-05 05:19:46Printable Lesson Plan on Understanding Money
Lesson Objective: Students will understand the concept of time and be able to read and write time on an analog clock and understand the duration of time.
Materials:
Chart paper and markers
Analog clocks (real or printed)
Worksheets with time problems
Introduction (5 minutes):
Begin by asking the students if they know what time is and how it is measured. Allow them to share their ideas and write them on the board.
Next, explain that time is a measure of the duration of an event and it is usually measured in hours, minutes, and seconds. We use clocks and watches to measure time and it is important to be able to read and write time on an analog clock.
Direct Instruction (15 minutes):
Using an analog clock (real or printed), demonstrate how to read and write time. For example, point to the hour hand and the minute hand and explain how to read the time.
Next, have the students practice reading and writing time on the analog clocks.
As they work, walk around to check for understanding and provide assistance as needed.
Guided Practice (15 minutes):
Provide the students with worksheets containing time problems.
Have them work in pairs to complete the worksheets, with one student solving the problem and the other student checking the work.
Monitor the student progress and provide assistance as needed.
Independent Practice (10 minutes):
Give the students more worksheets with time problems and have them work independently.
Circulate around the room to check for understanding and provide assistance as needed.
Closure (5 minutes):
Have students share one thing they learned about time today.
Review the main concept of time and remind the students that time is a measure of the duration of an event and it is usually measured in hours, minutes, and seconds. We use clocks and watches to measure time and it is important to be able to read and write time on an analog clock.
Assessment: Observe the students during independent practice and check their worksheets for accuracy.
Extension:
Have the students create their own time problems and have them share it with the class.
Allow them to play math games that involve time, such as “Time Race”
Note:
Remember to differentiate instruction to meet the needs of all the students in your class.
Encourage students to use time in real-life situations, such as managing their time and planning their day.
Overall, the goal of this lesson is to introduce the concept of time and provide students with hands-on practice reading and writing time on an analog clock and understanding the duration of time. Through the use of analog clocks, worksheets, and interactive activities, students will develop a better understanding of time and be able to apply it in real-life situations.
https://www.fractions4kids.com/wp-content/uploads/2023/02/fractions-for-kids-79.jpg8531280fractions4kidshttps://www.fractions4kids.com/wp-content/uploads/2023/01/logo-2.pngfractions4kids2023-02-04 18:11:432023-02-05 05:19:23Understanding Time Printable Lesson Plan for Teachers
Lesson Title:”Comparing Numbers: Third Grade Math”
Lesson Objective: Students will be able to compare and order numbers up to 1,000 using symbols (>, <, =).
Materials:
Whiteboard and markers
Number cards (1-1,000)
Worksheets with number comparisons
Chart paper and markers
Introduction (10 minutes): Start the lesson by reviewing the concepts of greater than (>), less than (<), and equal to (=) symbols. Write examples of these symbols on the whiteboard and have students give examples of numbers that would fit in each category. For example:
100 < 500 = 700
Next, have students work in pairs and use the number cards to create their own examples of greater than, less than, and equal to. Once they have finished, have them share their examples with the class.
Direct Instruction (20 minutes): Introduce the concept of ordering numbers from least to greatest and greatest to least. Write a few examples on the whiteboard and have students work in pairs to order a set of numbers. As they work, circulate the room to provide assistance and check for understanding. Next, have students work independently to complete a worksheet with number comparisons and ordering. This will serve as a formative assessment of their understanding of the concept.
Guided Practice (20 minutes): Divide the class into small groups and provide each group with a set of numbers. Have them work together to order the numbers from least to greatest and greatest to least. As they work, circulate the room to provide assistance and check for understanding.
Independent Practice (20 minutes): Provide students with a worksheet to complete independently. This worksheet should include a variety of number comparisons and ordering tasks.
Closure (10 minutes): As a class, review the concepts covered in the lesson and have students share any strategies they found helpful when ordering numbers. Next, create a class chart listing the strategies discussed.
Assessment: Formative assessment will be used throughout the lesson to check for understanding, including the worksheets completed during direct instruction and guided practice. A summative assessment will be given at the end of the unit to assess student mastery of the concept.
https://www.fractions4kids.com/wp-content/uploads/2023/02/fractions-for-kids-61.jpg8531280fractions4kidshttps://www.fractions4kids.com/wp-content/uploads/2023/01/logo-2.pngfractions4kids2023-02-04 18:11:422023-02-05 05:19:02Comparing Numbers: Third Grade Math Lesson Plan
Begin the lesson by reviewing the concepts of addition, subtraction, multiplication and division.
Ask students to give examples of when they have used mixed operations in their everyday lives.
Show an example of mixed operations problem and ask the students to identify the operations used.
Direct Instruction (15 minutes):
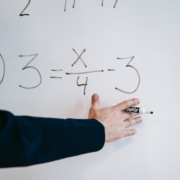
Use a whiteboard to model mixed operations problems for students.
For example, model solving the problem “32 + 8 – 5 x 2 = ?”
Explain to students that mixed operations problems require them to use more than one operation to solve the problem.
Write the problem on the board: 32 + 8 – 5 x 2
Ask students to repeat the problem and the order of operations (PEMDAS)
Use manipulative materials to help students visualize the problem and solve it.
Guided Practice (20 minutes):
Provide students with mixed operations worksheets.
Have students work in pairs to solve the problems.
Circulate the room to provide individual assistance as needed.
After 10 minutes, have students share their answers with the class and provide feedback on any errors.
Independent Practice (20 minutes):
Give students word problem worksheets that incorporate mixed operations.
Have students work independently to solve the problems.
Monitor student progress and provide additional support as needed.
Closure (5 minutes):
Review the main concepts of mixed operations with the class.
Ask students to share one thing they learned during the lesson.
Remind students to practice their mixed operations skills at home.
Assessment:
Observe students during independent practice and provide feedback on their understanding of the concept.
Collect and grade worksheets to assess students’ grasp of the material.
Note:
The time allocation for this lesson is approximate and can be adjusted depending on the class pace, student needs, and the teacher’s preference.
This lesson plan can be adapted to use different materials and activities that suit the teacher’s style and the student’s learning needs.
The teacher may need to adjust the level of difficulty and the complexity of the problems to meet the class’s needs.
The use of manipulative materials will help to make the concept of mixed operations more concrete, making it easier for students to understand and visualize.
It’s essential to emphasize the order of operations (PEMDAS) when solving mixed operations problems.
Encourage students to keep practicing their mixed operations skills to become more fluent in solving problems.
https://www.fractions4kids.com/wp-content/uploads/2023/02/fractions-for-kids-72.jpg8531280fractions4kidshttps://www.fractions4kids.com/wp-content/uploads/2023/01/logo-2.pngfractions4kids2023-02-04 18:11:422023-02-05 05:18:45Mixed Operations for Third Graders Math Lesson Plan
Lesson Title:”Understanding Place Values: Third Grade Math”
Lesson Objective: Students will be able to understand and identify place values of whole numbers up to 1,000.
Materials:
Whiteboard and markers
Base-10 blocks
Place value chart
Place value worksheets
Introduction (10 minutes): Start the lesson by reviewing the concept of place value. Write the number “543” on the whiteboard and ask students to identify the place value of each digit. Next, use base-10 blocks to demonstrate the place value of each digit in the number.
Direct Instruction (20 minutes): Introduce the place value chart and have students work in pairs to fill in the chart with whole numbers up to 1,000. As they work, circulate the room to provide assistance and check for understanding. Next, have students work independently to complete a worksheet that practices identifying place values. This will serve as a formative assessment of their understanding of the concept.
Guided Practice (20 minutes): Divide the class into small groups and provide each group with a set of whole numbers. Have them work together to identify the place value of each digit. As they work, circulate the room to provide assistance and check for understanding.
Independent Practice (20 minutes): Provide students with a worksheet to complete independently. This worksheet should include a variety of place value identification tasks.
Closure (10 minutes): As a class, review the concepts covered in the lesson and have students share any strategies they found helpful when identifying place values. Next, create a class chart listing the strategies discussed.
Assessment: Formative assessment will be used throughout the lesson to check for understanding, including the worksheets completed during direct instruction and guided practice. A summative assessment will be given at the end of the unit to assess student mastery of the concept.
Note: It is important to emphasize that the place value of a digit depends on its position in the number. The digit in the ones place has a place value of 1, the digit in the tens place has a place value of 10 and the digit in the hundreds place has a place value of 100. Also, it is important to relate this concept with the base 10 system and how digits represent different values based on their position.
https://www.fractions4kids.com/wp-content/uploads/2023/02/fractions-for-kids-62.jpg8531280fractions4kidshttps://www.fractions4kids.com/wp-content/uploads/2023/01/logo-2.pngfractions4kids2023-02-04 18:11:422023-02-05 05:18:26Lesson Plan on Understanding Place Values: Third Grade Math
Lesson Title:Understanding Properties of Mathematics
Lesson Objective: Students will understand and identify the different properties of mathematics, including the commutative, associative, and distributive properties.
Materials:
Chart paper and markers
Worksheets with math problems
Manipulatives (such as base ten blocks or unifix cubes)
Introduction (5 minutes):
Begin by asking the students if they know what properties of mathematics are. Allow them to share their ideas and write them on the board.
Next, explain that properties are the rules that govern how numbers work. They help us figure out how to solve problems and make sense of numbers.
Direct Instruction (15 minutes):
Introduce the commutative property by using examples such as 3 + 4 = 4 + 3 and 5 x 2 = 2 x 5. Explain that this property states that changing the order of the numbers in a math problem does not change the answer.
Introduce the associative property by using examples such as (3 + 4) + 5 = 3 + (4 + 5) and (5 x 2) x 3 = 5 x (2 x 3). Explain that this property states that changing the grouping of the numbers in a math problem does not change the answer.
Introduce the distributive property by using examples such as 3 x (4 + 5) = (3 x 4) + (3 x 5) and 2 x (5 + 3) = (2 x 5) + (2 x 3). Explain that this property states that when you multiply a single number by a sum of two or more numbers, you can get the same answer by multiplying the single number by each number in the sum and then adding the products.
Guided Practice (15 minutes):
Provide the students with worksheets containing math problems that demonstrate the properties discussed.
Have them work in pairs to complete the worksheets, with one student solving the problem and the other student checking the work.
Monitor the student progress and provide assistance as needed.
Independent Practice (10 minutes):
Give the students more worksheets with math problems that demonstrate the properties discussed, and have them work independently.
Circulate around the room to check for understanding and provide assistance as needed.
Closure (5 minutes):
Have students share one thing they learned about properties of mathematics today.
Review the main concept of properties and remind the students that properties are the rules that govern how numbers work.
Assessment: Observe the students during independent practice and check their worksheets for accuracy.
Extension:
Have the students create their own math problems that demonstrate the properties discussed and have them share it with the class.
Allow them to play math games that involve properties, such as “Properties Match”
Note:
Remember to differentiate instruction to meet the needs of all the students in your class.
Encourage students to use manipulatives and pictures whenever possible to help them understand the concept of properties.
Overall, the goal of this lesson is to introduce the concept of properties of mathematics and provide students with hands-on practice identifying and solving problems that demonstrate the commutative, associative, and distributive properties. Through the use of examples, worksheets, and interactive activities, students will develop a better understanding of properties and be able to solve problems independently.
https://www.fractions4kids.com/wp-content/uploads/2023/02/fractions-for-kids-73.jpg8531279fractions4kidshttps://www.fractions4kids.com/wp-content/uploads/2023/01/logo-2.pngfractions4kids2023-02-04 18:11:422023-02-05 05:17:46Understanding Properties of Mathematics Printable Lesson Plan
Lesson Title:”Mastering Addition: Third Grade Math”
Lesson Objective: Students will be able to add whole numbers up to 100 and understand the concept of carrying and borrowing.
Materials:
Whiteboard and markers
Base-10 blocks
Addition worksheets
Number cards (1-100)
Introduction (10 minutes): Start the lesson by reviewing the concept of addition. Write the number sentence “5 + 3 = 8” on the whiteboard and have students count out 8 base-10 blocks to show the visual representation of the problem.
Direct Instruction (20 minutes): Introduce the concepts of carrying and borrowing. Write an example of a problem that requires carrying on the whiteboard and have students work in pairs to solve the problem using base-10 blocks. As they work, circulate the room to provide assistance and check for understanding. Next, have students work independently to complete a worksheet that practices addition problems that require carrying. This will serve as a formative assessment of their understanding of the concept.
Guided Practice (20 minutes): Divide the class into small groups and provide each group with a set of addition problems that require borrowing. Have them work together to solve the problems, using base-10 blocks to visualize the process. As they work, circulate the room to provide assistance and check for understanding.
Independent Practice (20 minutes): Provide students with a worksheet to complete independently. This worksheet should include a variety of addition problems, including some that require carrying and borrowing.
Closure (10 minutes): As a class, review the concepts covered in the lesson and have students share any strategies they found helpful when solving addition problems that require carrying and borrowing. Next, create a class chart listing the strategies discussed.
Assessment: Formative assessment will be used throughout the lesson to check for understanding, including the worksheets completed during direct instruction and guided practice. A summative assessment will be given at the end of the unit to assess student mastery of the concept.
Note: It is important to relate the concept of carrying and borrowing to the base 10 system, and how digits represent different values based on their position. Also, Students should understand that when adding numbers in columns, if the sum of the digits in a column exceeds ten, they have to carry over the extra digit to the next column and so on.
https://www.fractions4kids.com/wp-content/uploads/2023/02/fractions-for-kids-63.jpg8531280fractions4kidshttps://www.fractions4kids.com/wp-content/uploads/2023/01/logo-2.pngfractions4kids2023-02-04 18:11:422023-02-05 05:16:47Printable Lesson Plan on Mastering Addition: Third Grade Math