Counting and Identifying Number Patterns Lesson Plan
Lesson Title:Counting and Identifying Number Patterns
Lesson Objective: Students will be able to count by 2s, 5s and 10s, and identify number patterns up to 100.
Materials: -Number line 0-100 -Number pattern worksheets -Base-10 blocks or manipulatives
Introduction (5 minutes): Begin by reviewing the numbers up to 100 with the students. Ask them if they know what counting by 2s, 5s, and 10s means. Introduce the concept of counting by 2s, 5s, and 10s, and the importance of identifying number patterns.
Direct Instruction (10 minutes): Using the number line, demonstrate how to count by 2s, 5s, and 10s. Show students how to count by 2s by saying every other number, by 5s by saying every fifth number and by 10s by saying every tenth number.
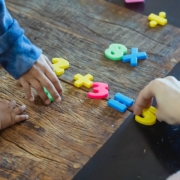
Guided Practice (15 minutes): Have students work in pairs, using the number line, base-10 blocks or manipulatives, and count by 2s, 5s, and 10s. Circulate around the room to assist and check for understanding.
Independent Practice (15 minutes): Give students a worksheet with number patterns and have them identify the pattern and complete the pattern.
Closure (5 minutes): Review what students have learned about counting by 2s, 5s, and 10s and identifying number patterns. Ask a few students to share their answers from the independent practice worksheet.
Assessment: Observe students during independent practice, and check their worksheets for accuracy.
Note: The time and activities can be adjusted as per your requirement and class size. You can also include additional activities like counting by other numbers or creating their own number pattern.