Understanding Time for Kindergarten Children Lesson Plan

Lesson Title:Understanding Time for Kindergarten Children

Lesson Objective: Students will be able to identify and read a clock to the hour and half hour, and understand the concept of time as it relates to daily routines and activities.

Materials:

  • Clock with movable hands
  • Time worksheets
  • Clock flashcards
  • Chart paper and markers
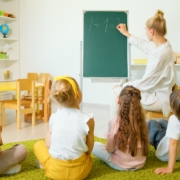
  • Introduction: Begin the lesson by asking the students to name different times of the day, such as morning, afternoon, and evening. Write their responses on chart paper. Then, introduce the concept of a clock and how it helps us keep track of time. Show the students the clock and demonstrate how the hands move to indicate the time.

    Activity 1: Clock Flashcards. Distribute the clock flashcards to the students and have them work in pairs to match the time on the card to the matching clock face. As they complete the activity, walk around the room and provide feedback and encouragement.

    Activity 2: Time Worksheets. Provide the students with worksheets that have pictures of different activities and the corresponding time. Have the students match the activity to the correct time on the clock. For example, “eating breakfast” would match with “7:00 AM.”

    Activity 3: Creating a daily schedule. Divide the students into small groups and provide them with chart paper and markers. Have the students brainstorm and create a schedule of their daily activities and the corresponding times. For example, “Wake up at 7:00 AM, eat breakfast at 7:30 AM, go to school at 8:00 AM” etc.

    Closure: Review the concepts learned during the lesson by asking the students to tell the time on the clock. Have them also share one thing they learned about time today. Lastly, remind students that time is an important aspect of our lives and we should use it wisely.

    Assessment: Observe students during the different activities and note their understanding of the concept of time. Collect the daily schedule chart papers and review them for accuracy and understanding.

    Note: This is a basic lesson plan for understanding time for Kindergarten children. You should adjust the activities and materials according to your student’s learning style and abilities.

    Additionally, you could include some games and songs that could help the kids to remember the time better and also learn in a fun way.

    Introduction to Identifying Halves, Thirds, and Fourths Printable Lesson Plan

    Lesson Title:Introduction to Identifying Halves, Thirds, and Fourths

    Lesson Objective: Students will be able to understand and identify halves, thirds, and fourths of a whole using concrete materials and visual models.

    Materials:

  • A set of linking cubes or other manipulatives (such as blocks or counters)
  • Fraction circles or other visual models (such as number lines or rectangles)
  • Fraction identification worksheets (with pictures of halves, thirds, and fourths)
  • Introduction (5 minutes):

  • Begin by reviewing the concepts of equal parts and whole with the students. Use concrete examples (such as cutting an apple into equal parts) to demonstrate these concepts.
  • Introduce the concept of halves, thirds, and fourths and explain that they are specific types of equal parts. Use concrete materials (such as linking cubes) to demonstrate this concept.
  • Activity 1 (10 minutes):

  • Divide students into small groups and give each group a set of linking cubes and fraction circles.
  • Explain that the fraction circles can be used to help them identify halves, thirds, and fourths.
  • Model identifying a simple fraction (such as 1/2) using the linking cubes and fraction circles. Show the students how to divide the whole into equal parts and then count the number of parts to find the fraction.
  • Allow students to work with their partners to identify different fractions using the linking cubes and fraction circles.
  • Activity 2 (10 minutes):

  • Provide students with a set of fraction identification worksheets.
  • Explain that the worksheets contain pictures of halves, thirds, and fourths and that the students need to use the strategies learned in the previous activity to identify the fractions.
  • Allow students to work independently or with a partner to complete the worksheets.
  • As students work, circulate around the room and provide support and guidance as needed.
  • Activity 3 (10 minutes):

  • Gather the students together and have them share the fractions they identified and the strategies they used.
  • Allow students to explain their thinking and reasoning.
  • Provide feedback and praise for their efforts and progress.
  • Conclusion (5 minutes):

  • Review the concepts of halves, thirds, and fourths and the strategies used to identify them.
  • Encourage students to continue practicing identifying fractions using concrete materials and visual models.
  • Lesson Plan on Introduction to Equal Parts

    Lesson Title:Introduction to Equal Parts

    Lesson Objective: Students will be able to understand the concept of equal parts and represent them using concrete materials and visual models.

    Materials:

  • A set of linking cubes or other manipulatives (such as blocks or counters)
  • Fraction circles or other visual models (such as number lines or rectangles)
  • Equal parts worksheets (with problems that involve equal parts)
  • Introduction (5 minutes):

  • Begin by reviewing the concept of whole with the students. Use concrete examples (such as a whole pizza or a whole apple) to demonstrate this concept.
  • Introduce the concept of equal parts and explain that it is dividing a whole into equal portions. Use concrete materials (such as linking cubes) to demonstrate this concept.
  • Activity 1 (10 minutes):

  • Divide students into small groups and give each group a set of linking cubes and fraction circles.
  • Explain that the fraction circles can be used to help them represent equal parts.
  • Model dividing a whole into equal parts (such as 2 equal parts) using the linking cubes and fraction circles. Show the students how to count the number of parts to find the number of equal parts.
  • Allow students to work with their partners to divide different wholes into equal parts using the linking cubes and fraction circles.
  • Activity 2 (10 minutes):

  • Provide students with a set of equal parts worksheets.
  • Explain that the worksheets contain problems that involve equal parts and that the students need to use the strategies learned in the previous activity to solve the problems.
  • Allow students to work independently or with a partner to complete the worksheets.
  • As students work, circulate around the room and provide support and guidance as needed.
  • Activity 3 (10 minutes):

  • Gather the students together and have them share the equal parts they represented and the strategies they used.
  • Allow students to explain their thinking and reasoning.
  • Provide feedback and praise for their efforts and progress.
  • Conclusion (5 minutes):

  • Review the concepts of equal parts and the strategies used to represent them.
  • Encourage students to continue practicing representing equal parts using concrete materials and visual models.
  • Remind students that with practice and perseverance, they will become experts in understanding equal parts!
  • Assessment:

  • Observe students as they work on the activities and listen to their explanations of the equal
  • Introduction to Fractions lesson plan

    Lesson Title:Introduction to Fractions

    Lesson Objective: Students will be able to understand the concept of fractions and represent them using concrete materials.

    Materials:

  • A set of linking cubes or other manipulatives (such as blocks or counters)
  • Fraction circles or other visual models (such as number lines or rectangles)
  • Fraction worksheets (with problems that involve fractions)
  • Introduction (5 minutes):

  • Begin by reviewing the concepts of equal parts and whole with the students. Use concrete examples (such as cutting an apple into equal parts) to demonstrate these concepts.
  • Introduce the concept of fractions and explain that it is a way to represent equal parts of a whole. Use concrete materials (such as linking cubes) to demonstrate this concept.
  • Activity 1 (10 minutes):

  • Divide students into small groups and give each group a set of linking cubes and fraction circles.
  • Explain that the fraction circles can be used to help them represent fractions.
  • Model representing a simple fraction (such as 1/2) using the linking cubes and fraction circles. Show the students how to divide the whole into equal parts and then count the number of parts to find the fraction.
  • Allow students to work with their partners to represent different fractions using the linking cubes and fraction circles.
  • Activity 2 (10 minutes):

  • Provide students with a set of fraction worksheets.
  • Explain that the worksheets contain problems that involve fractions and that the students need to use the strategies learned in the previous activity to solve the problems.
  • Allow students to work independently or with a partner to complete the worksheets.
  • As students work, circulate around the room and provide support and guidance as needed.
  • Activity 3 (10 minutes):

  • Gather the students together and have them share the fractions they represented and the strategies they used.
  • Allow students to explain their thinking and reasoning.
  • Provide feedback and praise for their efforts and progress.
  • Conclusion (5 minutes):

  • Review the concepts of fractions and the strategies used to represent them.
  • Encourage students to continue practicing representing fractions using concrete materials and visual models.
  • Introduction to Positions pdf printable lesson plan

    Lesson Title:Introduction to Positions

    Lesson Objective: Students will be able to understand and use positional language (e.g. above, below, beside, in front of, behind, etc.) to describe the location of objects.

    Materials:

  • A set of objects (e.g. blocks, stuffed animals, etc.)
  • Position word cards (with words such as above, below, beside, in front of, behind, etc.)
  • Worksheets (with illustrations of objects in different positions)
  • Introduction (5 minutes):

  • Begin by reviewing the concepts of up and down, left and right with the students. Have them point to different directions to reinforce the concepts.
  • Introduce the concept of positional language and explain that it is a way to describe where something is in relation to something else. Use concrete examples (such as pointing to an object and saying “the pencil is in front of the book”) to demonstrate this concept.
  • Activity 1 (10 minutes):

  • Divide students into small groups and give each group a set of objects and position word cards.
  • Explain that the position word cards can be used to help them describe the location of the objects.
  • Model using positional language to describe the location of an object (such as “the block is above the stuffed animal”).
  • Allow students to work with their partners to practice describing the location of the objects using the position word cards.
  • Activity 2 (10 minutes):

  • Provide students with a set of worksheets.
  • Explain that the worksheets contain illustrations of objects in different positions and that the students need to use positional language to describe the location of the objects.
  • Allow students to work independently or with a partner to complete the worksheets.
  • As students work, circulate around the room and provide support and guidance as needed.
  • Activity 3 (10 minutes):

  • Gather the students together and have them share their descriptions of the objects’ positions.
  • Allow students to explain their thinking and reasoning.
  • Provide feedback and praise for their efforts and progress.
  • Conclusion (5 minutes):
  • Review the concepts of positional language and the strategies used to describe the location of objects.
  • Encourage students to continue practicing using positional language in their everyday conversations.
  • Remind students that with practice and perseverance, they will become experts in using positional language!
  • Assessment:

  • Observe students as they work on the activities and listen to their explanations of the positions of objects.
  • Collect the worksheets and assess the accuracy of the positional language used.
  • Note: The duration of activities, introduction and conclusion can be adjusted based on the time available in your classroom. Also, you can use different materials as per the availability.

    Introduction to Mixed Operations pdf printable lesson plan

    Lesson Title:Introduction to Mixed Operations

    Lesson Objective: Students will be able to understand and solve mixed operations problems (addition and subtraction) using concrete materials and visual models.

    Materials:

  • A set of base ten blocks (or any other manipulatives)
  • Number lines (or other visual models)
  • Mixed operations worksheets (with problems that include addition and subtraction)
  • Introduction (5 minutes):

  • Begin by reviewing the concepts of addition and subtraction with the students. Have them count aloud with you to reinforce number recognition and counting skills.
  • Introduce the concept of mixed operations and explain that it is solving a problem that includes both addition and subtraction. Use concrete materials (such as base ten blocks) to demonstrate this concept.
  • Activity 1 (10 minutes):

  • Divide students into small groups and give each group a set of base ten blocks and number lines.
  • Explain that the number lines can be used to help them solve mixed operations problems.
  • Model solving a simple mixed operations problem (such as 8+3-2) using the number line and base ten blocks. Show the students how to count the total number of blocks and then take away some blocks to find the final answer.
  • Allow students to work with their partners to solve mixed operations problems using the number lines and base ten blocks.
  • Activity 2 (10 minutes):

  • Provide students with a set of mixed operations worksheets.
  • Explain that the worksheets contain problems that include both addition and subtraction.
  • Allow students to work independently or with a partner to complete the worksheets.
  • As students work, circulate around the room and provide support and guidance as needed.
  • Activity 3 (10 minutes):

  • Gather the students together and have them share the mixed operations problems they solved and the strategies they used.
  • Allow students to explain their thinking and reasoning.
  • Provide feedback and praise for their efforts and progress.
  • Conclusion (5 minutes):
  • Review the concepts of mixed operations and the strategies used to solve mixed operations problems.
  • Encourage students to continue practicing their mixed operations skills using concrete materials and visual models.
  • Remind students that with practice and perseverance, they will become experts in mixed operations!
  • Assessment:

  • Observe students as they work on the activities and listen to their explanations of their solutions.
  • Collect the mixed operations worksheets and assess the accuracy of the answers.
  • Note: The duration of activities, introduction and conclusion can be adjusted based on the time available in your classroom. Also, you can use different manipulatives and visual models as per the availability.

    Introduction to Subtraction up to 10 Printable Lesson Plan

    Lesson Title:Introduction to Subtraction up to 10

    Lesson Objective: Students will be able to understand and solve subtraction problems up to 10 using concrete materials and visual models.

    Materials:

  • A set of base ten blocks (or any other manipulatives)
  • Number lines (or other visual models)
  • Subtraction worksheets (with problems up to 10)
  • Introduction (5 minutes):

  • Begin by reviewing the numbers 1-10 with the students. Have them count aloud with you to reinforce number recognition and counting skills.
  • Introduce the concept of subtraction and explain that it is finding the difference between two numbers by taking away one group from another. Use concrete materials (such as base ten blocks) to demonstrate this concept.
  • Activity 1 (10 minutes):

  • Divide students into small groups and give each group a set of base ten blocks and number lines.
  • Explain that the number lines can be used to help them solve subtraction problems.
  • Model solving a simple subtraction problem (such as 8-4) using the number line and base ten blocks. Show the students how to count the remaining number of blocks.
  • Allow students to work with their partners to solve subtraction problems using the number lines and base ten blocks.
  • Activity 2 (10 minutes):

  • Provide students with a set of subtraction worksheets.
  • Explain that the worksheets contain simple subtraction problems that can be solved using the strategies learned in the previous activity.
  • Allow students to work independently or with a partner to complete the worksheets.
  • As students work, circulate around the room and provide support and guidance as needed.
  • Activity 3 (10 minutes):

  • Gather the students together and have them share the subtraction problems they solved and the strategies they used.
  • Allow students to explain their thinking and reasoning.
  • Provide feedback and praise for their efforts and progress.
  • Conclusion (5 minutes):
  • Review the concepts of subtraction and the strategies used to solve subtraction problems.
  • Encourage students to continue practicing their subtraction skills using concrete materials and visual models.
  • Remind students that with practice and perseverance, they will become experts in subtraction!
  • Assessment:

  • Observe students as they work on the activities and listen to their explanations of their solutions.
  • Collect the subtraction worksheets and assess the accuracy of the answers.
  • Note: The duration of activities, introduction and conclusion can be adjusted based on the time available in your classroom. Also, you can use different manipulatives and visual models as per the availability.

    Introduction to Subtraction up to 5 lesson plan for teachers

    Lesson Title:Introduction to Subtraction up to 5

    Lesson Objective: Students will be able to understand and solve subtraction problems up to 5 using concrete materials and visual models.

    Materials:

  • A set of unifix cubes (or any other manipulatives)
  • Number bonds (or other visual models)
  • Subtraction worksheets (with problems up to 5)
  • Introduction (5 minutes):

  • Begin by reviewing the numbers 1-5 with the students. Have them count aloud with you to reinforce number recognition and counting skills.
  • Introduce the concept of subtraction and explain that it is finding the difference between two numbers by taking away one group from another. Use concrete materials (such as unifix cubes) to demonstrate this concept.
  • Activity 1 (10 minutes):

  • Divide students into small groups and give each group a set of unifix cubes and number bonds.
  • Explain that the number bonds can be used to help them solve subtraction problems.
  • Model solving a simple subtraction problem (such as 5-3) using the number bond and unifix cubes. Show the students how to count the remaining number of cubes.
  • Allow students to work with their partners to solve subtraction problems using the number bonds and unifix cubes.
  • Activity 2 (10 minutes):

  • Provide students with a set of subtraction worksheets.
  • Explain that the worksheets contain simple subtraction problems that can be solved using the strategies learned in the previous activity.
  • Allow students to work independently or with a partner to complete the worksheets.
  • As students work, circulate around the room and provide support and guidance as needed.
  • Activity 3 (10 minutes):

  • Gather the students together and have them share the subtraction problems they solved and the strategies they used.
  • Allow students to explain their thinking and reasoning.
  • Provide feedback and praise for their efforts and progress.
  • Conclusion (5 minutes):
  • Review the concepts of subtraction and the strategies used to solve subtraction problems.
  • Encourage students to continue practicing their subtraction skills using concrete materials and visual models.
  • Remind students that with practice and perseverance, they will become experts in subtraction!
  • Assessment:

  • Observe students as they work on the activities and listen to their explanations of their solutions.
  • Collect the subtraction worksheets and assess the accuracy of the answers.
  • Note: The duration of activities, introduction and conclusion can be adjusted based on the time available in your classroom. Also, you can use different manipulatives and visual models as per the availability.

    Lesson Plan for teachers on Addition up to 10

    Lesson Title:Introduction to Addition up to 10

    Lesson Objective: Students will be able to understand and solve addition problems up to 10 using concrete materials and visual models.

    Materials:

  • A set of base ten blocks (or any other manipulatives)
  • Number bonds (or other visual models)
  • Addition worksheets (with problems up to 10)
  • Introduction (5 minutes):

  • Begin by reviewing the numbers 1-10 with the students. Have them count aloud with you to reinforce number recognition and counting skills.
  • Introduce the concept of addition and explain that it is combining two groups of numbers to find a total. Use concrete materials (such as base ten blocks) to demonstrate this concept.
  • Activity 1 (10 minutes):

  • Divide students into small groups and give each group a set of base ten blocks and number bonds.
  • Explain that the number bonds can be used to help them solve addition problems.
  • Model solving a simple addition problem (such as 4+5) using the number bond and base ten blocks. Show the students how to count the total number of blocks.
  • Allow students to work with their partners to solve addition problems using the number bonds and base ten blocks.
  • Activity 2 (10 minutes):

  • Provide students with a set of addition worksheets.
  • Explain that the worksheets contain simple addition problems that can be solved using the strategies learned in the previous activity.
  • Allow students to work independently or with a partner to complete the worksheets.
  • As students work, circulate around the room and provide support and guidance as needed.
  • Activity 3 (10 minutes):

  • Gather the students together and have them share the addition problems they solved and the strategies they used.
  • Allow students to explain their thinking and reasoning.
  • Provide feedback and praise for their efforts and progress.
  • Conclusion (5 minutes):
  • Review the concepts of addition and the strategies used to solve addition problems.
  • Encourage students to continue practicing their addition skills using concrete materials and visual models.
  • Remind students that with practice and perseverance, they will become experts in addition!
  • Assessment:

  • Observe students as they work on the activities and listen to their explanations of their solutions.
  • Collect the addition worksheets and assess the accuracy of the answers.
  • Note: The duration of activities, introduction and conclusion can be adjusted based on the time available in your classroom. Also, you can use different manipulatives and visual models as per the availability.

    Introduction to Addition up to 5 Printable Lesson Plan

    Lesson Title:Introduction to Addition up to 5

    Lesson Objective: Students will be able to understand and solve addition problems up to 5 using concrete materials and visual models.

    Materials:

  • A set of counting bears (or any other manipulatives)
  • Ten-frames (or other visual models)
  • Addition worksheets (with problems up to 5)
  • Introduction (5 minutes):

  • Begin by reviewing the numbers 1-5 with the students. Have them count aloud with you to reinforce number recognition and counting skills.
  • Introduce the concept of addition and explain that it is combining two groups of numbers to find a total. Use concrete materials (such as counting bears) to demonstrate this concept.
  • Activity 1 (10 minutes):

  • Divide students into small groups and give each group a set of counting bears and ten-frames.
  • Explain that the ten-frames can be used to help them solve addition problems.
  • Model solving a simple addition problem (such as 2+3) using the ten-frame and counting bears. Show the students how to count the total number of bears.
  • Allow students to work with their partners to solve addition problems using the ten-frames and counting bears.
  • Activity 2 (10 minutes):

  • Provide students with a set of addition worksheets.
  • Explain that the worksheets contain simple addition problems that can be solved using the strategies learned in the previous activity.
  • Allow students to work independently or with a partner to complete the worksheets.
  • As students work, circulate around the room and provide support and guidance as needed.
  • Activity 3 (10 minutes):

  • Gather the students together and have them share the addition problems they solved and the strategies they used.
  • Allow students to explain their thinking and reasoning.
  • Provide feedback and praise for their efforts and progress.
  • Conclusion (5 minutes):
  • Review the concepts of addition and the strategies used to solve addition problems.
  • Encourage students to continue practicing their addition skills using concrete materials and visual models.
  • Remind students that with practice and perseverance, they will become experts in addition!
  • Assessment:

  • Observe students as they work on the activities and listen to their explanations of their solutions.
  • Collect the addition worksheets and assess the accuracy of the answers.
  • Note: The duration of activities, introduction and conclusion can be adjusted based on the time available in your classroom. Also, you can use different manipulatives and visual models as per the availability.