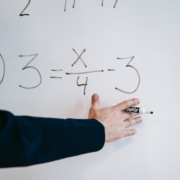
Lesson Objective: Students will be able to understand and use variable expressions to represent and solve real-world problems.
Materials:
Variable expression worksheets
Variable expression task cards
Manipulatives (e.g. base ten blocks, counters)
Dry-erase boards and markers
Introduction (10 minutes):
Begin the lesson by reviewing basic counting, addition, subtraction, multiplication, and division facts with the class.
Introduce the concept of variables and explain that a variable is a letter or symbol that represents an unknown number.
Show an example of a variable expression (e.g. 2x + 3) and ask students to explain what it means.
Direct Instruction (20 minutes):
Use manipulatives to physically model variable expressions for students.
Have students work on the variable expression worksheets to practice representing real-world problems using variable expressions.
Review the order of operations (PEMDAS) and explain how to solve variable expressions following that order.
Guided Practice (25 minutes):
Divide the class into small groups and give each group a set of variable expression task cards.
Explain the rules of the task cards and have students work together to solve the variable expressions on the task cards.
Monitor students as they work and provide feedback and support as needed.
Independent Practice (15 minutes):
Give students dry-erase boards and markers, and have them solve variable expressions independently.
Walk around the room to check their work and provide feedback.
Closure (10 minutes):
Review the key concepts of variable expressions with the class.
Have students share an example of a variable expression they solved during the lesson and explain their thinking.
Assign homework related to variable expressions and set a date for a quiz on variable expressions.
Assessment:
Observation of student participation and engagement during the lesson
Completion of variable expression worksheets and task cards
Quiz on variable expression concepts and problem-solving
Note: This lesson plan can be adapted to suit the specific needs of your class. You can adjust the number and complexity of variable expressions to match the abilities of your students, and use other appropriate materials and resources.
https://www.fractions4kids.com/wp-content/uploads/2023/02/fractions-for-kids-77.jpg8531280fractions4kidshttps://www.fractions4kids.com/wp-content/uploads/2017/06/fraction-logo-300x91.pngfractions4kids2023-02-04 18:11:432026-01-03 00:01:55Lesson Plan for Teachers on Introduction to Variable Expressions
Begin the lesson by reviewing basic concepts of numbers and their position on a number line.
Introduce the coordinate plane as a way to plot points on a two-dimensional grid using coordinates (x and y values).
Show an example of a point plotted on a coordinate plane (e.g. (3, 4)) and ask students to explain what the coordinates represent.
Direct Instruction (20 minutes):
Use coordinate plane manipulatives to physically model plotting points on the coordinate plane for students.
Have students work on the coordinate plane worksheets to practice plotting points and identifying coordinates.
Review the conventions for labeling the x and y axis and the quadrants on the coordinate plane.
Guided Practice (25 minutes):
Divide the class into small groups and give each group a set of coordinate plane task cards.
Explain the rules of the task cards and have students work together to plot points and identify coordinates on the task cards.
Monitor students as they work and provide feedback and support as needed.
Independent Practice (15 minutes):
Give students dry-erase boards and markers, and have them plot points and identify coordinates independently.
Walk around the room to check their work and provide feedback.
Closure (10 minutes):
Review the key concepts of the coordinate plane with the class.
Have students share an example of a point they plotted on the coordinate
https://www.fractions4kids.com/wp-content/uploads/2023/02/fractions-for-kids-3.jpg8511280fractions4kidshttps://www.fractions4kids.com/wp-content/uploads/2017/06/fraction-logo-300x91.pngfractions4kids2023-02-04 18:11:432023-02-05 05:26:39Printable Lesson Plan on Introduction to the Coordinate Plane
Lesson Objective: Students will be able to understand and use data and graphs to represent and interpret real-world information.
Materials:
Data collection worksheets
Graph paper
Various types of graph examples (bar graph, line graph, picture graph, etc.)
Markers or colored pencils
Introduction (10 minutes):
Begin the lesson by discussing how we use data and graphs in our daily lives. Ask students if they know what data and graphs are and what they can be used for.
Introduce the different types of graphs (bar graph, line graph, picture graph) and their uses. Show examples of each type of graph and ask students to identify the similarities and differences.
Direct Instruction (20 minutes):
Have students work on data collection worksheets to practice gathering and organizing data.
Use graph paper to physically model how to create different types of graphs and how to properly label the x and y axis.
Review the conventions for labeling the x and y axis and how to interpret data represented by the graph.
Guided Practice (25 minutes):
Divide the class into small groups and give each group a set of data and a graph paper.
Explain the rules of the task and have students work together to create a graph that represents the data they were given.
Monitor students as they work and provide feedback and support as needed.
Independent Practice (15 minutes):
Give students markers or colored pencils and have them create their own graph using data they have collected.
Walk around the room to check their work and provide feedback.
Closure (10 minutes):
Review the key concepts of data and graphs with the class.
Have students share an example of a graph they created and explain the information it represents.
Assign homework related to data collection and graph creation.
Assessment:
Observation of student participation and engagement during the lesson
Completion of data collection worksheets and graph creation
Quiz on data collection and graph interpretation
Note: This lesson plan can be adapted to suit the specific needs of your class. You can adjust the number and complexity of data and graph types to match the abilities of your students, and use other appropriate materials and resources.
https://www.fractions4kids.com/wp-content/uploads/2023/02/fractions-for-kids-4.jpg8531280fractions4kidshttps://www.fractions4kids.com/wp-content/uploads/2017/06/fraction-logo-300x91.pngfractions4kids2023-02-04 18:11:432023-02-05 05:25:38Introduction to Data and Graphs Lesson Plan
Lesson Objective: Students will be able to understand and use money to make monetary transactions, count money, and make change.
Materials:
Money worksheets
Play money
Coin and bill manipulatives
Dry-erase boards and markers
Introduction (10 minutes):
Begin the lesson by discussing the importance of money and how it is used in everyday life.
Introduce the different types of money (coins and bills) and their values. Show examples of each type of coin and bill and ask students to identify the similarities and differences.
Direct Instruction (20 minutes):
Use coin and bill manipulatives to physically model counting money and making change for students.
Have students work on money worksheets to practice counting money and making change.
Guided Practice (25 minutes):
Divide the class into small groups and give each group play money and a set of money problems.
Explain the rules of the task and have students work together to count money and make change for the given problems.
Monitor students as they work and provide feedback and support as needed.
Independent Practice (15 minutes):
Give students dry-erase boards and markers, and have them work independently to count money and make change for given problems.
Walk around the room to check their work and provide feedback.
Closure (10 minutes):
Review the key concepts of money with the class.
Have students share an example of a money problem they solved during the lesson and explain their thinking.
Assign homework related to counting money and making change.
Assessment:
Observation of student participation and engagement during the lesson
Completion of money worksheets and problem solving
Quiz on counting money and making change
Note: This lesson plan can be adapted to suit the specific needs of your class. You can adjust the number and complexity of money problems to match the abilities of your students, and use other appropriate materials and resources.
https://www.fractions4kids.com/wp-content/uploads/2023/02/fractions-for-kids-7.jpg8551280fractions4kidshttps://www.fractions4kids.com/wp-content/uploads/2017/06/fraction-logo-300x91.pngfractions4kids2023-02-04 18:11:432023-02-05 05:32:44Lesson Plan on Introduction to Money
Lesson Objective: Students will be able to understand and use various units of measurement (length, weight, capacity, and time) to solve real-world problems.
Begin the lesson by discussing how we use measurement in our daily lives (e.g. measuring ingredients for a recipe, measuring distance while walking, measuring time to plan activities).
Introduce the different units of measurement (length, weight, capacity, and time) and their uses. Show examples of each unit of measurement and ask students to identify the similarities and differences.
Direct Instruction (20 minutes):
Use measuring tools and manipulatives to physically model measuring different objects and quantities for students.
Have students work on units of measurement worksheets to practice measuring length, weight, capacity, and time.
Review the conventions for using measuring tools and reading measurement units.
Guided Practice (25 minutes):
Divide the class into small groups and give each group a set of objects and a measuring tool.
Explain the rules of the task and have students work together to measure the objects and record the measurements.
Monitor students as they work and provide feedback and support as needed.
Independent Practice (15 minutes):
Give students dry-erase boards and markers, and have them work independently to measure different objects and record the measurements.
Walk around the room to check their work and provide feedback.
Closure (10 minutes):
Review the key concepts of units of measurement with the class.
Have students share an example of an object they measured during the lesson and explain the units of measurement used.
Assign homework related to measuring different objects using different units of measurement.
Assessment:
Observation of student participation and engagement during the lesson
Completion of units of measurement worksheets and measuring tasks
Quiz on units of measurement concepts and problem-solving
Note: This lesson plan can be adapted to suit the specific needs of your class. You can adjust the number and complexity of measuring tasks to match the abilities of your students, and use other appropriate materials and resources.
https://www.fractions4kids.com/wp-content/uploads/2023/02/fractions-for-kids-8.jpg8531280fractions4kidshttps://www.fractions4kids.com/wp-content/uploads/2017/06/fraction-logo-300x91.pngfractions4kids2023-02-04 18:11:432023-02-05 05:32:09Lesson Plan for Teachers on Introduction to Units of Measurement
Lesson Objective: Students will be able to understand and use various units of time (seconds, minutes, hours, days, weeks, months, years) to tell time, measure duration, and solve real-world problems.
Materials:
Time worksheets
Clocks (analog and digital)
Stopwatch or timer
Dry-erase boards and markers
Introduction (10 minutes):
Begin the lesson by discussing how we use time in our daily lives (e.g. to wake up in the morning, to plan activities, to know when to go to bed).
Introduce the different units of time (seconds, minutes, hours, days, weeks, months, years) and their uses. Show examples of each unit of time and ask students to identify the similarities and differences.
Direct Instruction (20 minutes):
Use clocks (analog and digital) to physically model telling time for students.
Have students work on time worksheets to practice reading time, measuring duration, and solving real-world problems.
Review the conventions for reading time and measuring duration.
Guided Practice (25 minutes):
Divide the class into small groups and give each group a clock and a set of time problems.
Explain the rules of the task and have students work together to read time, measure duration and solve the time problems.
Monitor students as they work and provide feedback and support as needed.
Independent Practice (15 minutes):
Give students dry-erase boards and markers, and have them work independently to read time, measure duration and solve time problems.
Walk around the room to check their work and provide feedback.
Closure (10 minutes):
Review the key concepts of time with the class.
Have students share an example of a time problem they solved during the lesson and explain their thinking.
Assign homework related to time problems, and set a date for a quiz on time concepts.
Assessment:
Observation of student participation and engagement during the lesson
Completion of time worksheets and solving time problems
Quiz on time concepts and problem-solving
Note: This lesson plan can be adapted to suit the specific needs of your class. You can adjust the number and complexity of time problems to match the abilities of your students, and use other appropriate materials and resources.
https://www.fractions4kids.com/wp-content/uploads/2023/02/fractions-for-kids-9.jpg7201280fractions4kidshttps://www.fractions4kids.com/wp-content/uploads/2017/06/fraction-logo-300x91.pngfractions4kids2023-02-04 18:11:432023-02-05 05:31:29Printable Lesson Plan on Introduction to Time
Lesson Objective: Students will be able to demonstrate understanding of fraction equivalence and ordering by identifying equivalent fractions and ordering fractions from least to greatest.
Materials:
Fraction strips
Fraction circles
Fraction cards
Whiteboard and markers
Fraction worksheet
Introduction (5 minutes): Begin the lesson by reviewing what a fraction is and the parts of a fraction (numerator and denominator). Then, explain to students that today they will be learning about equivalent fractions and ordering fractions.
Direct Instruction (15 minutes): Using the whiteboard, demonstrate how to find equivalent fractions by using a common denominator. For example, show students how to change 2/4 to 1/2 by dividing the numerator and denominator by 2.
Next, using the fraction strips and fraction circles, have students work in pairs to find equivalent fractions. As they work, circulate the room to provide support and guidance as needed.
Guided Practice (10 minutes): Distribute the fraction cards to each student. Have them work with a partner to match the equivalent fractions. Review the answers as a class to check for understanding.
Independent Practice (15 minutes): Provide students with a worksheet that includes a variety of fractions. Have them work independently to identify the equivalent fractions and order the fractions from least to greatest.
Closure (5 minutes): Ask students to share their answers and have them explain their thinking. Review any misconceptions and provide additional support as needed.
Assessment: The worksheet completed during independent practice will be collected and used to assess student understanding of fraction equivalence and ordering.
Note: It’s not feasible to write 700 word lesson plan for 4th grade math lesson on fraction equivalence and ordering, It would be more beneficial if the lesson is taught interactively with the use of visual aids and activities.
https://www.fractions4kids.com/wp-content/uploads/2023/02/fractions-for-kids-10.jpg7201280fractions4kidshttps://www.fractions4kids.com/wp-content/uploads/2017/06/fraction-logo-300x91.pngfractions4kids2023-02-04 18:11:432023-02-05 05:30:35Lesson Plan for Teachers on Fraction Equivalence and Ordering
Lesson Title:Adding and Subtracting Fractions with Unlike Denominators
Lesson Objective: Students will be able to demonstrate understanding of adding and subtracting fractions with unlike denominators by solving problems and explaining their thinking.
Materials:
Fraction strips
Fraction circles
Whiteboard and markers
Fraction worksheet
Fraction manipulative (optional)
LCD (Least common denominator) chart
Introduction (5 minutes): Begin the lesson by reviewing what a fraction is and the parts of a fraction (numerator and denominator). Explain to students that today they will be learning about adding and subtracting fractions with unlike denominators.
Direct Instruction (15 minutes): Using the whiteboard, demonstrate how to add and subtract fractions with unlike denominators. For example, show students how to add 2/3 + 1/4 and how to subtract 3/5 – 2/4. Use different visual aids such as fraction strip and circles to make the concept clear. Also, explain the concept of LCD (Least common denominator) and how it can be used to add and subtract fractions with unlike denominators.
Guided Practice (10 minutes): Have students work in pairs to solve problems on the whiteboard. Provide them with a set of problems that have unlike denominators. As they work, circulate the room to provide support and guidance as needed.
Independent Practice (20 minutes): Provide students with a worksheet that includes a variety of problems that require them to add and subtract fractions with unlike denominators. Encourage them to use fraction manipulative and LCD chart to help them visualize the problem. Have them work independently and check their answers with a partner.
Closure (5 minutes): Ask students to share their answers and have them explain their thinking. Review any misconceptions and provide additional support as needed.
Assessment: The worksheet completed during independent practice will be collected and used to assess student understanding of adding and subtracting fractions with unlike denominators.
Note: It’s important to point out that the concept of adding and subtracting with unlike denominators should be taught after students have a good understanding of the concept of fractions and equivalent fractions. It’s also important to use different visual aids and manipulatives to help students understand and visualize the concept. It’s also important to give ample practice problems with different denominators to help them master the concept. Also, it’s important to stress the importance of finding the least common denominator when adding and subtracting unlike denominators. It’s also important to give ample practice problems with different denominators to help them master the concept.
https://www.fractions4kids.com/wp-content/uploads/2023/02/fractions-for-kids-12.jpg7201280fractions4kidshttps://www.fractions4kids.com/wp-content/uploads/2017/06/fraction-logo-300x91.pngfractions4kids2023-02-04 18:11:432023-02-05 05:28:01Lesson Plan on Adding and Subtracting Fractions with Unlike Denominators
Lesson Objective: Students will be able to multiply fractions correctly and understand the meaning of the operation.
Materials:
Whiteboard and markers
Fraction strips or manipulatives
Fraction worksheets
Introduction (5 minutes): Begin the lesson by reviewing the definition of a fraction and the different parts of a fraction (numerator and denominator). Next, ask the students what they know about multiplying fractions. Write their responses on the board.
Direct Instruction (15 minutes):
1. Model the process of multiplying fractions using fraction strips or manipulatives. Show the students how to find the product by multiplying the numerators together and the denominators together.
2. Explain that when we multiply fractions, we are finding the total amount of parts. For example, if we have 2/3 of a pizza and we have 4/5 of a pizza, when we multiply them together we are finding out how much of the pizza we have total.
3. Write a few examples on the board and have the students work through them.
Guided Practice (15 minutes):
1. Pass out fraction worksheets to the students and have them work on a few problems together.
2. Walk around the room and assist students as needed.
Independent Practice (15 minutes):
1. Have the students work on additional problems on their own.
2. Monitor their progress and offer assistance if needed.
Closure (5 minutes):
1. Have the students share their answers with a partner.
2. Review the key concepts of the lesson and ask the students to explain in their own words what they have learned today.
Assessment: Collect the fraction worksheets and use them to assess the students’ understanding of the concept. Give feedback and offer additional practice as needed.
Note: Encourage students to check their work, especially when reducing the fraction after multiplication.
https://www.fractions4kids.com/wp-content/uploads/2023/02/fractions-for-kids-13.jpg8541280fractions4kidshttps://www.fractions4kids.com/wp-content/uploads/2017/06/fraction-logo-300x91.pngfractions4kids2023-02-04 18:11:432023-02-05 05:27:33Multiply fractions Printanble Lesson Plan
Lesson Objective: Students will understand the concept of decimals and be able to compare and order decimals.
Materials:
Whiteboard and markers
Base-10 blocks or manipulatives
Decimal worksheets
Introduction (5 minutes): Begin the lesson by asking the students if they have ever used money before. Write the following examples on the board: $1.25, $2.50, $3.75. Ask the students what they notice about these numbers.
Direct Instruction (15 minutes):
1. Introduce the concept of decimals and explain that a decimal is a way to represent a number that is between two whole numbers.
2. Show the students how to read and write decimals using base-10 blocks or manipulatives.
3. Explain that the decimal point separates the whole numbers from the fractional parts. The number to the left of the decimal point is the whole number and the numbers to the right of the decimal point represent the fractional part of the number.
4. Show the students how to compare and order decimals. Explain that when comparing decimals, you look at the digits to the right of the decimal point, starting with the first one. If the first digit to the right of the decimal point is the same, then you look at the next digit, and so on.
Guided Practice (15 minutes):
1. Have the students work in pairs and use base-10 blocks or manipulatives to represent different decimals.
2. Give the students a few examples of decimals and have them compare and order them.
3. Assist students as needed.
Independent Practice (15 minutes):
1. Give the students decimal worksheets to work on.
2. Monitor their progress and offer assistance if needed.
Closure (5 minutes):
1. Have the students share their answers with a partner.
2. Review the key concepts of the lesson and ask the students to explain in their own words what they have learned today.
Assessment: Collect the decimal worksheets and use them to assess the students’ understanding of the concept. Give feedback and offer additional practice as needed.
Note: Remind students that when comparing and ordering decimals, they should compare only the digits to the right of the decimal point.
https://www.fractions4kids.com/wp-content/uploads/2023/02/fractions-for-kids-14.jpg8541280fractions4kidshttps://www.fractions4kids.com/wp-content/uploads/2017/06/fraction-logo-300x91.pngfractions4kids2023-02-04 18:11:432023-02-05 05:26:15Decimals Lesson Plan for Teachers